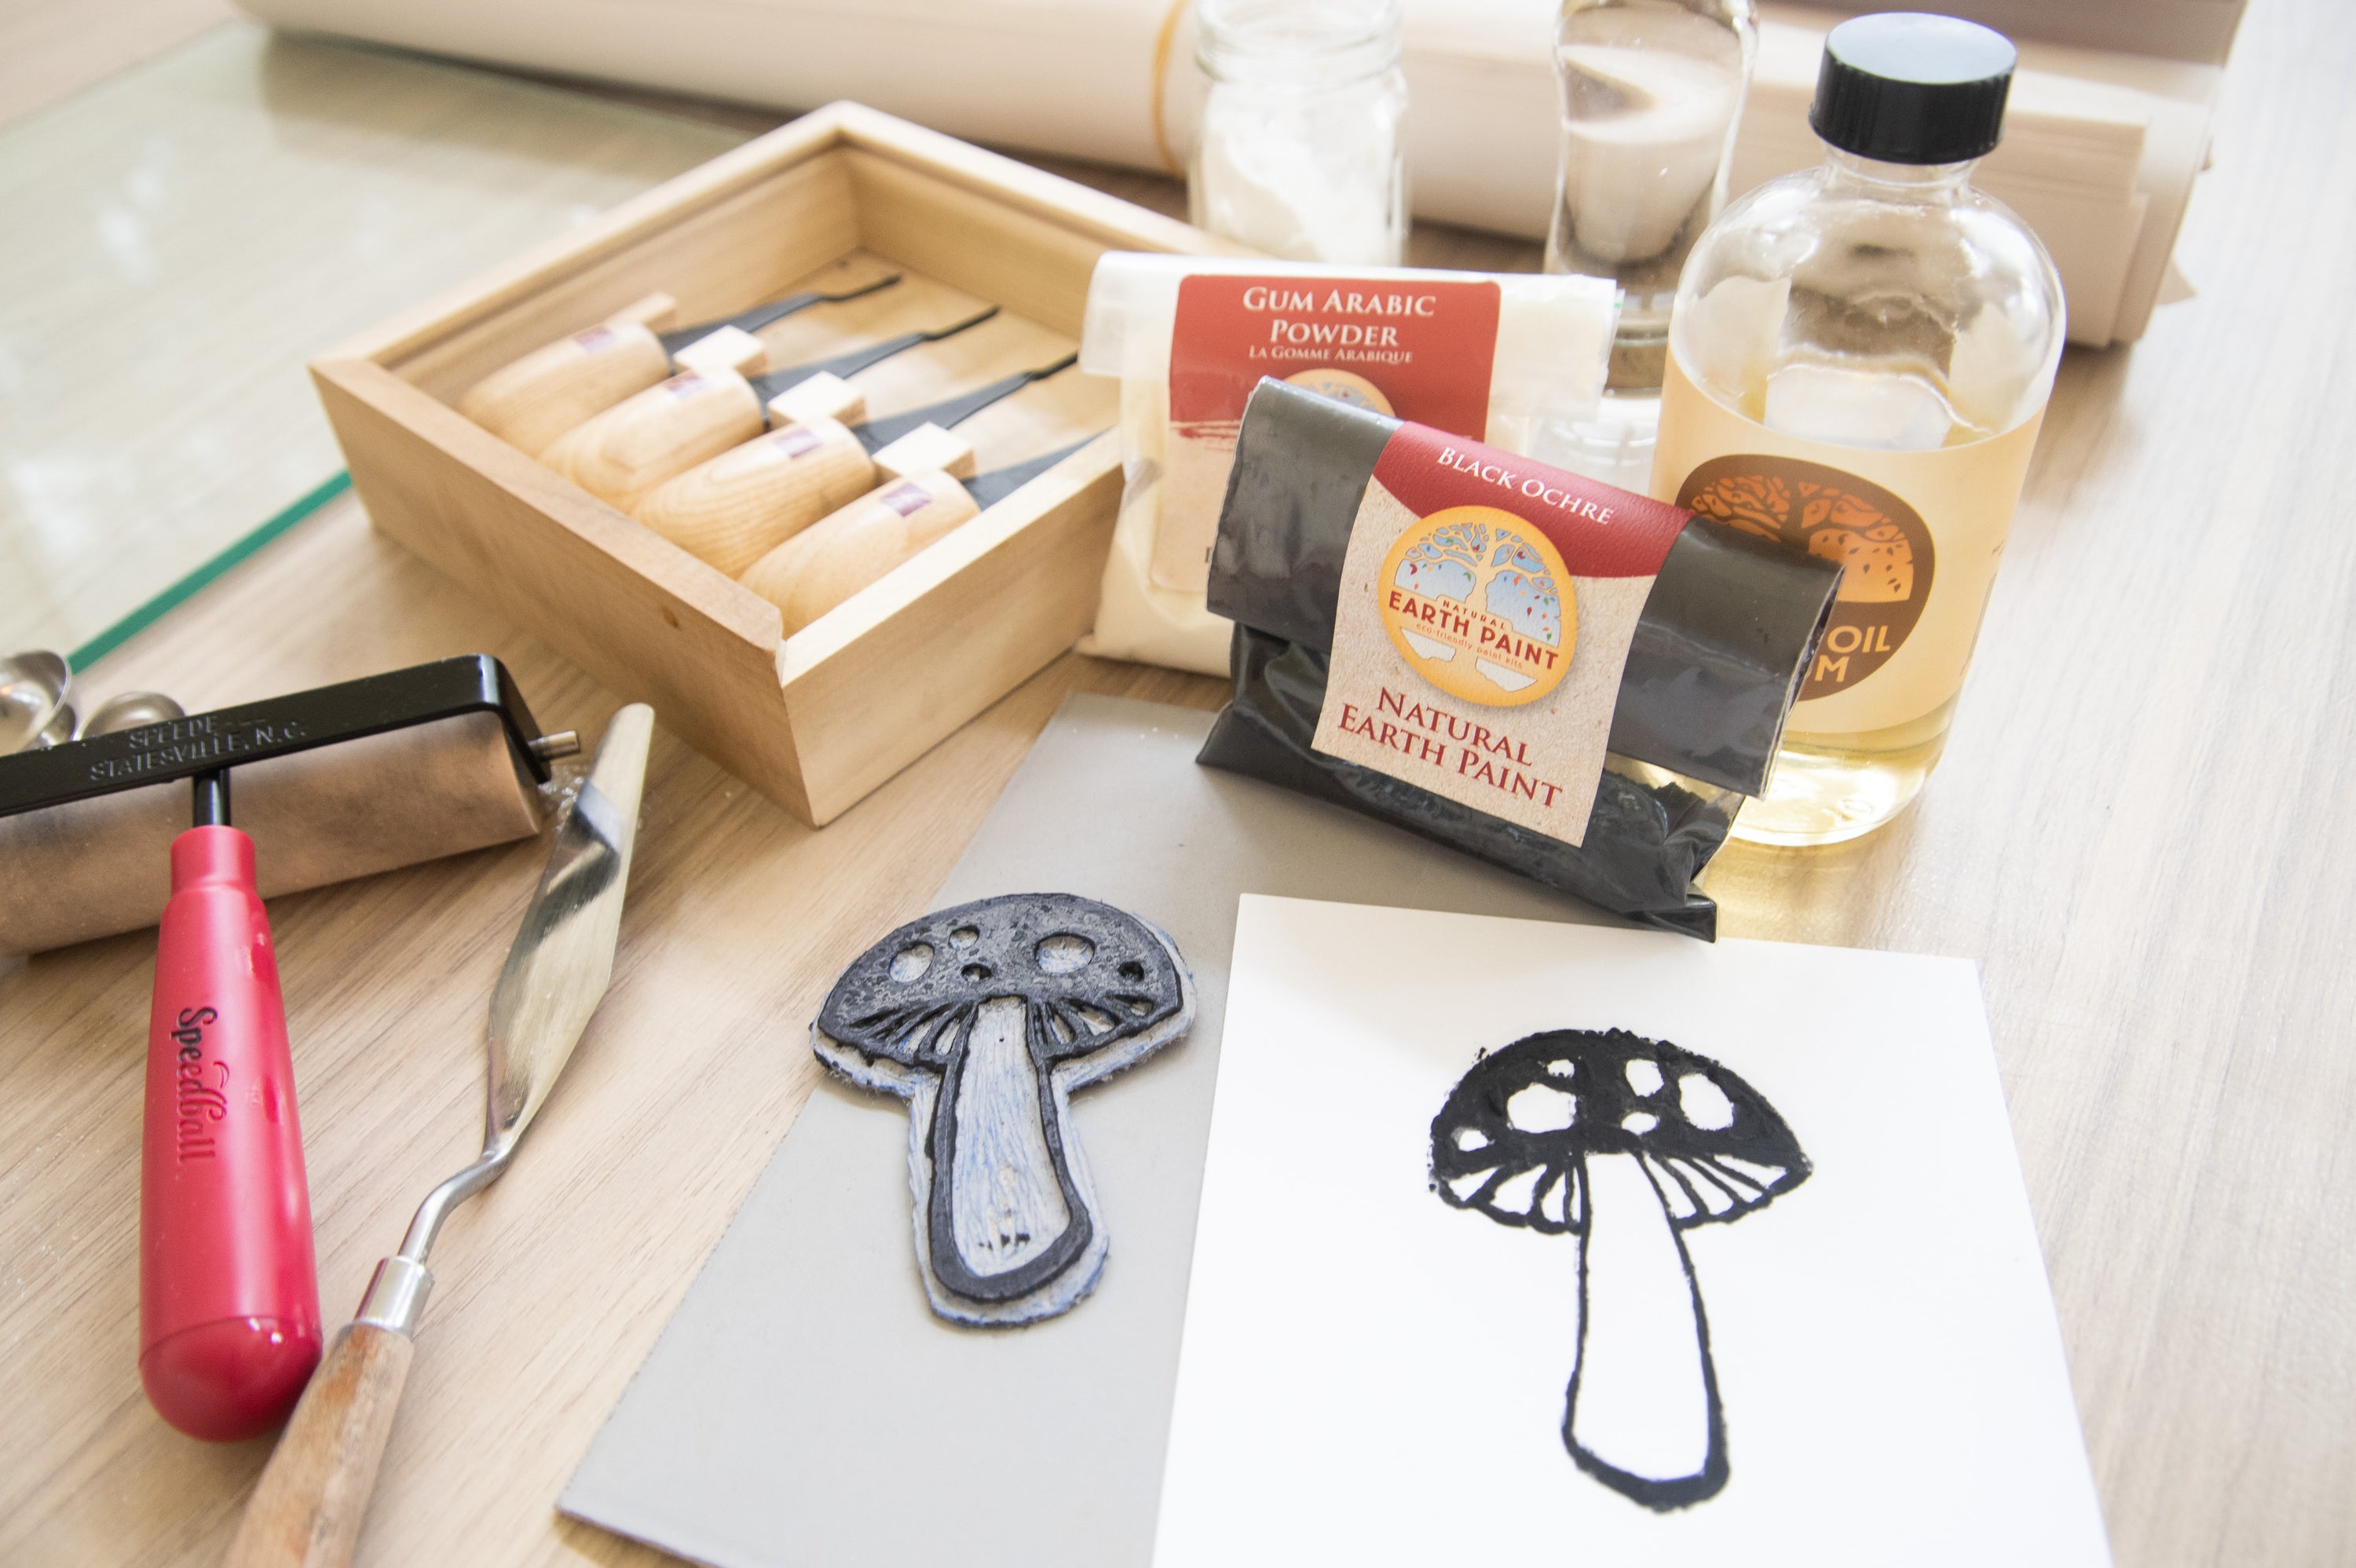
Create a student-grade, oil-based, relief print-making ink with a few simple ingredients! Note: For professional grade relief ink, follow this recipe.
Supplies:
-
Earth & Mineral Pigments
- Walnut Oil
- Gum Arabic Powder
- Rice Starch
Part 1: Making The Ink
Step 1: On a glass palette, mix 1 part pigment (e.g. 1 tsp) with 1 part walnut oil (e.g. 1 tsp) until you get a loose paste.

Step 2: Gradually mix in 1 part rice starch (e.g. 1 tsp) a little bit at a time to stiffen the paste.

Step 3: Sprinkle 1/4 part gum arabic powder (e.g. 1/4 tsp) and gently fold into paste with a palette knife.

Step 4: Test roll out your ink with your brayer and adjust recipe as needed to achieve the right consistency (some pigments are "thirstier" than others).
Part 2: Printing
Step 1: Carve your linoleum block.

Step 2: Roll out a thin layer of ink onto your brayer and ink your linoleum block.

Step 3: Place printmaking paper on top of your linoleum block. Using a barren (for large areas) and a wooden spoon (for fine details on your linoleum block), rub the back of your paper to transfer printmaking ink onto the paper. Set your print aside to dry.

Check out the full Youtube tutorial here.