Supplies:
- Natural Earth Paint
- Empty Toilet Paper Rolls
- Construction Paper
- Clothes Pins
- Coffee Filters
- Pipe Cleaners
- Glue
- Scissors
- A square of cardboard or poster board
- Painting Palette
Create Your Painting Palette
After you've gathered all of your supplies and mixed up your Natural Earth Children's Paint you can begin by flattening the toilet paper rolls. Open the roll back up and form into a petal shape. Then place open end of toilet paper roll onto your poster board and trace around with pencil/pen.

Apply a generous amount of paint along the pencil mark. This will allow your child to dip the roll into the paint and not waste paint.


3D Petals
To add a 3D element you can
paint the toilet paper rolls and cut out 1/4 in or so petal shapes. Flatten roll and then cut!

You aren't concentrating hard enough if your tongue isn't sticking out just a little. ;)


Stamping Flower Petals
To stamp, begin by applying some
paint
to the bottom of the toilet paper roll by dipping it into our petals of
paint. Then stamp the petals onto the construction paper. Working in a
circle to create a face of a flower.

Working in a circle to create a face of a flower.


Flower Pot
Don't forget to add the STEMS! (Whoop! we forgot, but we caught it before the glue dried)

Then cut out the flower pot. You can get super creative with your flowers with different shapes and colors here. We opted to go with simple lines for the little fingers to cut out.


She tried very hard to stay on the line we had drawn on the paper. Be sure to make the pot large enough to allow all the flowers to fit into it.

Once the pot is placed you can go back over some of the petals that were coved and re-stamp them. That way it will look as if the flower petals are hanging over the side of the pot.

Adding 3D element (optional)
After the painted rolls are dry you can cut them. As stated
above about 1/4 inch or so will do. You don't want them to thick. Little
hands might struggle cutting through the toilet paper rolls (my 6 year
old needed a little extra help).

Flatten roll and then cut!

You can glue them on as leafs or add depth to your flower petals. We opted for flower petals.


Butterflies!
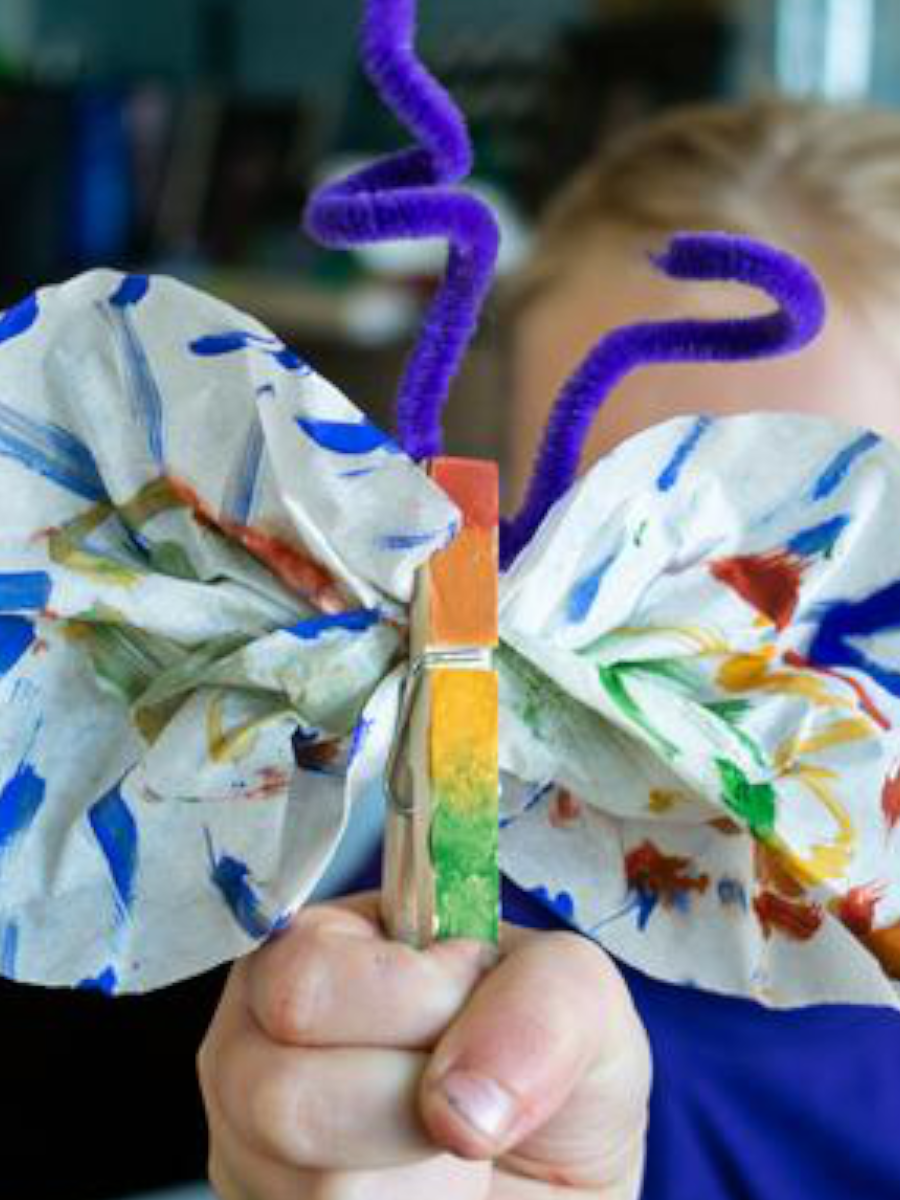
Now it's time for the butterfly! Grab the coffee filters, clothes
pin, pipe cleaners and paint brush. It's best to double them up of the
coffee liner just incase the paint seeps through.
PAINT!

Here you can be very detailed or sporadic. Either way they are going to look ADORABLE! Once you've painted the coffee filter and the clothes pin (one side is plenty) and they have dried you will assemble your butterfly.

With the coffee filter flat on the tap use your thumb and finger to pinch the top and bottom together gathering it in the middle. Clasp the cloth pin around the middle of the filter you just gathered. Then wrap pipe cleaner around the clothes pin opening. Keep the pipe cleaners straight or wrap them around your finger to give them a curl.

Personalize it!
Let your little one write a special message or opt for the traditional "Happy Mother's Day" like my little one did.

She added her special message at the end.


Happy Mother's Day to all you beautiful ladies!
Interested in more crafts featuring Natural Earth Paint products? Visit our Nature Crafts DIY page!
Follow us on Instagram, Facebook, and Pinterest for more natural inspiration.


