Love these paints. I appreciate the imperfect tubes, which have made it more affordable to try out colors.
I couldn't be happier with these paints. I got a whole fleet of colors for my 18th birthday and can't wait to do more with them! They behave just like traditonal acrylic paints, only with none of the harsh additives or nasty fumes. Do the Earth a favor and order from this company! 😍
I love painting in watercolor and gouache, but have always avoided acrylic paints because of their fumes and toxicity. Discovering Natural Earth Paints acryliks has greatly expanded my art practice! I use only nontoxic art materials and am thrilled to expand my options with another medium.
These paints are luscious and gooey straight from the tube, a dream to paint with from the very beginning. The colors are incredibly rich and yummy! In addition to painting, I look forward to making monoprints with them.
NEP’s customer service has been outstanding and I commend the company’s commitment to sustainability in every aspect of their products and shipping.
A few suggestions: I agree with the reviewer who wants the color names to accurately describe the colors, as well as full technical information on the labels. I’d also like to see colors like Cerulean Blue, Raw Umber, a bright warm orange, a light green such as Serpentine, and a bright, true pink added to the range.
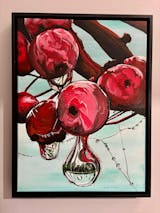
Here is my first ever painting in acryliks! Thank you again, NEP!
I switched to these paints after beating bladder cancer. I want nothing to do with toxins! Let me tell you about these paints. So very versatile. I buy the acylik heavy body and have found you can use them as is or add water which creates a stunning watercolor type effect. They work better than oils in my opinion and FAR better than regular toxic acrylic paint. I love love love them. I was skeptical before using them, (plant based? Ok sure…) but they provide superior coverage and blend ability. I was blown away! Please consider making all colors available in 4oz sizes, not just white. I highly recommend these paints,and fyi..their customer service team goes above and beyond if you have questions or issues regarding these paints,sealants etc. Thank you SO much for providing me with another paint option, I thought my painting days were over.
Wife and I are having a lot of fun painting each other. Easy to use. Cover nicely
This white face paint worked out so great! It covered so well and I only had to use a little bit. And I love that ingredients all natural and organic. The kids did not have any reaction on their face or eyes when they wore it for Halloween


 Stone Painting(ages 2-up)
 For Leaf Prints:


 Materials:

